


MICROBIOLOGY SAMPLING GUIDE
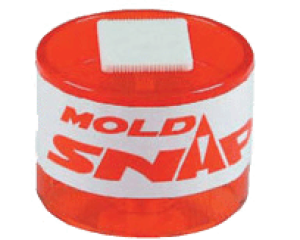
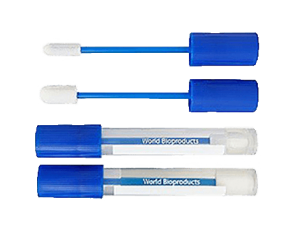
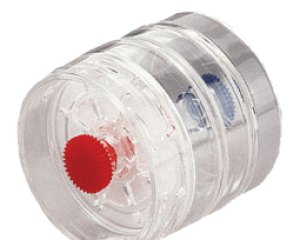
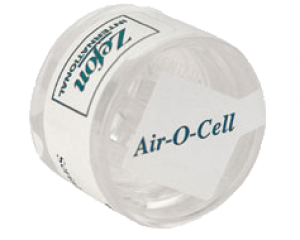


TABLE OF CONTENTS
- Air-O-Cell
- MoldSnap and MICRO-5
- Culturable Air Sampling (Fungi or Bacteria)
- Culturable Surface Sampling (Swabs and Bulk)
- ERMI Homeowner Sampling
- Real Time PCR Sampling
- Allergen Sampling
- Total Coliform Sampling
- Sewage Contamination in Buildings
- Legionella Sampling
- Methicillin-resistant Staphylococcus aureus (MRSA) Sampling
- Environmental Endotoxin Sampling
- Limiting Conditions for Pathogen Growth
- Microbiology Culture Media Information
AIR-O-CELLTM
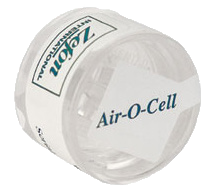
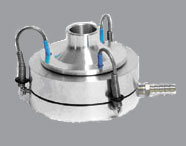
The Air-O-CellTM Air Sampling cassette is a sampling device designed for the rapid collection and analysis of a wide range of airborne particles. These include fungal spores, pollen, insect parts, skin cell fragments, fibers, and inorganic particulates. Air enters the cassette, the particles become impacted on the adhesive substrate, and the air leaves through the exit orifice. The airflow and patented cassette housing is designed in such a way that the particles are distributed and deposited equally as a “trace” on a special glass slide with adhesive contained in the cassette housing.
Benefits
- Useful for initial site testing, especially if fungal growth is not visible.
- Quick and simple procedure.
- Fast turnaround times available.
- Low chance of sample contamination.
Disadvantages
- Fungi cannot be fully speciated with this method. For example, Aspergillus sp. and Penicillium sp. are normally reported together due to the similarities in spore morphology.
- Spore viability cannot be assessed.
Materials
- Air-O-CellTM cassette.
- Vacuum pump suitable for operating at 15 liters per minute (lpm).
- Rotameter (for calibration of vacuum pump).
- Flexible tubing.
Recommended Sampling Procedure
The cassette is designed to operate at a recommended flow rate of 15 lpm. Lower flow rates may result in a loss of some spores and the accumulation of others in a non-uniform manner. Higher flow rates may damage the spores. Therefore, it is important not to run the sampling pumps at lower flow rates for longer times to achieve the recommended air volume.
Calibration of Sampling Flow Rate
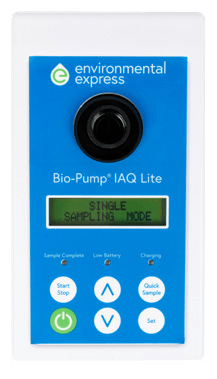
A specially designed bubble tube, available from the manufacturer, can be used to set the flow rate for the ½” Air-O-Cell mini pump. It cannot be used with any other style of pump or Mini pump and any other type of sampling pump.
Sampling Duration
The sampling time is dependent on the density of particulate in the environment. It is important not to overload the sample, otherwise it will be impossible to quantify the types of spores, pollen and particulates that are present. The following table represents typical sample times to attain a sharply defined trace with good dispersion of the spores:
Recommended Sampling Intervals for the Air-O-CellTM Air Sampling Cassette At Typical Collection Flow Rates
| Typical Environmental Conditions Flow Rates Collection at 15 lpm | |
| Clean ``office” or outdoors (no visible dust) | 10 minutes |
| Indoor environment, high activity and personnel | 5 minutes |
| Indoor environment, drywall renovation or heavy industrial dust | 1 minute |
AIR SAMPLING FOR TOTAL SPORE COUNTS
Sampling Procedure
- Prior to sampling, calibrate the pump to 15 liters per minute.
- Remove and retain tape seals covering Air-O-CellTM inlet and outlet.
- Attach the outlet (round hole) to the supplied tubing adapter (available upon request) or use standard ½” PVC tubing (for use with high volume pumps only).
- Start the sampling pump and sample for an appropriate period of time (see chart above).
- Remove Air-O-CellTM from tubing and reseal with the original tape seal. Label sample.
- Complete an EMSL Chain of Custody (COC), available on the website (www.emsl.com), detailing client name and information, project name or number, sample #, description of area, and volume of air used.
- To reduce shipping damage, it is recommended that the Air-O-CellTM be placed in a corrugated box to ensure safe arrival at the laboratory.
Quality Control Suggestions
- An effective interpretation is based on the comparison of indoor and outdoor samples. An outdoor sample comparison will help demonstrate whether spore amplification is occurring indoors.
- Obtain a control sample from a non-complaint area for comparison.
- Periodically sending a blank cassette for analysis is a good practice.
- Flow rate is critical for accurate results. Remember to calibrate and recalibrate the pump prior to all sampling (15 liters/ minute).
- Never use cassettes that are damaged or expired.
For more information contact:
Zefon International at www.zefon.com. Air-O-CellTM is a registered trademark of Zefon International
MOLDSNAP AND MICRO-5
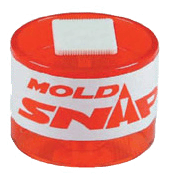
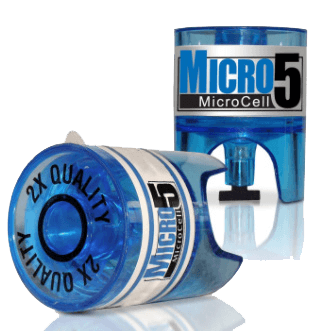
The Zefon MoldSnap (Product ID 8715304) and the Micro5 MicroCell (Product ID 8715306) were designed to operate at a flow rate of 5 liters per minute for optimal collection efficiency. Cassettes should be stored at 50° – 80° F.
Do not use in temperatures below 37° F!
Sampling Procedures
- Remove pin from the bottom of the MoldSnap or Micro5.
- If using a conventional high-volume pump: Simply connect one end of tubing (5 feet or less) to the bottom of the cassette.
- If using a low volume pump such as a GilAir5: Simply attach a 1” piece of tubing to the bottom of the cassette.
- Connect the other end of tubing to a pump pre-calibrated to a flow rate of 5 LPM.
- Remove cap from the top of the cassette.
- Turn pump on and take a sample for an appropriate amount of time depending on environment. (See “Sampling Duration” below.)
- When sampling is completed, replace the pin and cap to the bottom and top of the cassette.
Sampling Duration
- Outdoor / Indoor Clean Environments = 8-10 minutes
- Indoor (Normal Activity) = 5 minutes
- Indoor (Heavy Particulates) = 1-3 minutes
- Inner wall cavity using the Micro5 only (with optional Inner Wall Adapter, Product ID 8715901) = 1-2 minutes
Tech Tip: Basic Mold Cleanup
The key to mold control is moisture control. It is important to dry water damaged areas and items within 24-48 hours to prevent mold growth. If mold is a problem in your home, clean up the mold and get rid of the excess water or moisture. Fix leaky plumbing or other sources of water. Wash mold off hard surfaces with detergent and water, and dry completely. Absorbent materials (such as ceiling tiles and carpet) that become moldy may have to be replaced. (Source: EPA http://www.epa.gov/mold/moldresources.html)
CULTURABLE AIR SAMPLING (FUNGI OR BACTERIA)
Particle Impactors (Andersen-type Samplers)
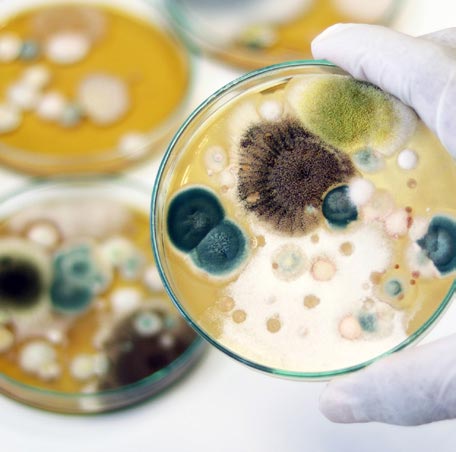
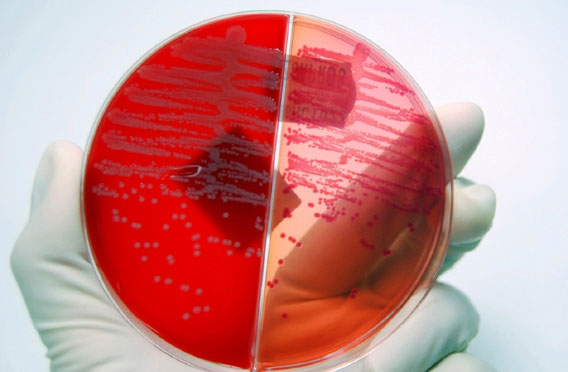
This method of air sampling involves drawing a measured volume of air over culture media in Petri dishes. The Petri dishes are incubated in the laboratory so the organisms impacted on the plate can grow. The fungi or bacteria are counted and identified. This method commonly uses an Andersen N-6 type impactor (e.g. EMSL VP-400 Microbial Sampler Product ID 8709001). Different agar plates are available from EMSL Analytical, Inc., depending on the types of fungi or bacteria to be identified.
Benefits
- Fungal cultures can determine whether the fungus is viable (alive) and allows for genus and species identification.
- Bacterial cultures provide enumeration and identification of culturable bacteria present in the air
Disadvantages
- Cultures take 6-10 days for the microorganisms to grow and be identified.
- Since most environmental samples contain a large number of organisms, each has to compete with others to grow on the media. As a result, fungi and bacteria present in the air may not be as well represented in culture.
- Some microbes do not grow well or at all on the culture media.
- Some microorganisms are unable to be identified, as they fail to produce key characteristics such as spores or they may not be described in the scientific literature.
General Media Recommendations Fungi and Bacteria
- For fungal sampling, in general, we recommend Malt Extract Agar (MEA).
- If you are sampling in dry areas, the use of DG18 will help select for the growth of dry-loving fungi that may not grow on MEA agar
- Sampling for Stachybotrys sp. can be achieved with either Cellulose Agar (CA) or Cornmeal Agar (CMA).
- For bacterial sampling, in general, we recommend Tryptic Soy Agar (TSA) or TSA w 5% blood.
- For sampling Gram negative bacteria, we recommend MacConkey Agar (MAC)
- For all other situations, the Microbiology Department will be happy to make recommendations based on your individual sampling situation.
- Sampling supplies may be ordered at www.emsl.com or by calling Customer Service: 800-220-3675.
How to Handle Microbiological Media (Agar plates)
- Agar plates must be kept refrigerated or on freezer packs until ready to use.
- The plates must be allowed to warm up to room temperature before taking a sample (approx. 15 minutes).
- Do not remove the lid from the plate at any time except during sampling.
- Seal the lid to the plate after sample collection with Parafilm or tape.
- The plates must be shipped back to EMSL with freezer packs by OVERNIGHT PRIORITY. Refreeze and reuse the original freezer pack (this type of freezer pack is stable for 24 hours).
- Adequate packing material must be sent to protect the plates.
- Plates must not come into direct contact with the freezer pack, as the media may freeze, invalidating the tests.
- If there is any delay in sending the agar plates to EMSL, they should be refrigerated until ready for overnight delivery.
Recommendations
- Wear latex or nitrile gloves during sampling.
- Use 70% isopropyl alcohol to disinfect sampling device between each sample.
- Place Petri dish lid in a clean bag during sampling to reduce any cross contamination.
- Include outside samples and a field blank for control.
Sampling Procedure
- Allow agar plates to reach room temperature before use.
- Attach one end of tubing to the intake of the vacuum pump and the other end to the inlet of the sampler.
- Calibrate the flow rate of the vacuum pump:
- Place an uncovered Petri dish into sampler (Do not submit this dish as a sample, discard after calibration).
- Turn on pump and adjust flow until the rotameter is at 28.3 LPM (flow rate is read from the middle of bearing on the rotameter).
- Remove stopper and rotameter prior to sampling.
- Wipe all exposed surfaces of sampler with a 70% isopropyl alcohol pad and allow to air dry.
- Place the agar plate on the sampler base so that the Petri dish rests on the three raised metal pins.
- Remove the cover of the Petri dish and place into a clean sample bag to minimize contamination (available upon request).
- Assemble the jet classification stage on the sampler and secure the inlet cone with the three attached clips.
- Set timer to appropriate time depending on environmental conditions (sampling time is usually between 2-5 minutes).
- Turn on the pump and start the timer simultaneously.
- When the time is up, turn off the pump and disassemble sampler and place cover back onto agar plate.
- Secure lid onto Petri dish with masking tape or Parafilm (avoid using electrical, packing, transparent and duct tape).
- Write the sample number on the bottom of the Petri dish.
- Record all appropriate information on the Chain of Custody.
- Return samples with an ice pack to EMSL Analytical for analysis.
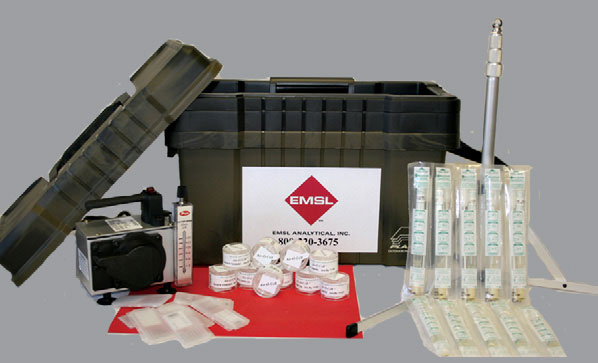
EMSL VP-400 Basic Kit with
E-Lite Pump 25 Pack
#8709003
Tech Tip: Can mold cause health problems?
Molds are usually not a problem indoors, unless mold spores land on a wet or damp spot and begin grow-ing. Molds have the potential to cause health problems. Molds produce allergens (substances that can cause allergic reactions), irritants, and in some cases, potentially toxic substances (mycotoxins). Inhaling or touch-ing mold or mold spores may cause allergic reactions in sensitive individuals. Allergic responses include hay fever-type symptoms, such as sneezing, runny nose, red eyes, and skin rash (dermatitis). Allergic reactions to mold are common. They can be immediate or delayed. Molds can also cause asthma attacks in people with asthma who are allergic to mold. In addition, mold exposure can irritate the eyes, skin, nose, throat, and lungs of both mold-allergic and non-allergic people. Symptoms other than the allergic and irritant types are not commonly reported as a result of inhaling mold. Research on mold and health effects is ongoing. This brochure provides a brief overview; it does not describe all potential health effects related to mold exposure. For more detailed information consult a health professional. You may also wish to consult your state or local health department. (Source EPA Document # 402-K-02-003)
CULTURABLE SURFACE SAMPLING
CULTURABLE SWAB SAMPLING
Benefits
- The culture swab is inexpensive, and surfaces can be quickly sampled.
- A useful test for initial site sampling.
- Species level identification possible.
- Viability of fungi is determined.

Disadvantages
- Areas of fungal growth are often small and scattered, so they may not all be picked up. Taking multiple samples will help overcome this problem.
- Health problems related to indoor microbial growth are generally caused by the inhalation of substantial numbers of airborne spores, sometimes over a long period of time. The presence of biological materials on a particular surface may not be a direct indication of what is in the air.
- This method detects only viable spores and hyphae but cannot detect nonviable or difficult to culture fungi. It is advisable to combine direct exam samples with culture methods if knowing the presence of non-viable fungi is important to your project.
- Cultures cannot distinguish between spores, hyphae, and other fungal cells; the results are reported as colony forming units.
Materials
- Sterile culturette/swab with appropriate buffer solution to collect and transport specimen (provided at your request by EMSL).
- Latex/nitrile gloves
Sample Collection
- Wearing gloves, remove swab from packaging material.
- Remove plug from media tube.
- Swab the desired area thoroughly, rolling the swab lightly back and forth over sampling area.
- Insert the swab in the tube, firmly close cap, and label appropriately.
- For quantitative culture reporting, the area swabbed needs to be entered on the chain of custody.
Complete an EMSL Chain of Custody (COC), available on our website (www.emsl.com), detailing client name and information, project name or number, sample #, and a description of the area.
Sample Shipment
- Place samples in a cooler with reusable ice packs
- Overnight shipping recommended
CULTURABLE BULK SAMPLING
Benefits
- Bulk sampling is inexpensive and surface materials can be quickly sampled.
- A useful test for inital site investigation.
- Species level identification possible.
- Viability of the fungi is determined.
Disadvantages
- Areas of fungal growth are often small and scattered, so they may not all be picked up in the bulk sample. Multiple samples will be needed to help overcome this problem.
- Health problems related to indoor microbial growth are generally caused by theinhalation of substantial numbers of airborne spores, sometimes over a long period of time. The presence of biological materials on a particular surface may not be a direct indication of what is in the air.
- This method detects only viable spores and hyphae but cannot detect nonviable or difficult to culture fungi. It is advisable to combine direct exam samples with culture methods if knowing the presence of non-viable fungi is important to your project.
- Cultures cannot distinguish between spores, hyphae, and other fungal cells; the results are reported as colony forming units.
Materials
- Sterile sampling bags (Ziplock) to collect and transport specimen (provided at your request by EMSL).
- Latex/nitrile gloves
Sample Collection
- Wearing gloves and using clean tools remove a representative area of growth along with the building material (sheetrock, wood, etc.). 1 inch square is sufficient.
- Place bulk material into sampling bag and label the outside of the bag with sampling location or description
Complete an EMSL Chain of Custody (COC), available on our website (www.emsl.com), detailing client name and information, project name or number, sample number, and a description of the area.
Sample Shipment
- Place samples in a cooler with reusable ice packs
- Overnight shipping recommended
ERMI HOMEOWNER SAMPLING
Step 1
Prepare your house for testing
Maximize quiescent conditions in the home the day before testing and during the test period. Turn off portable fans and the heating or air conditioning to avoid blowing air over the areas to be tested. Keep people away from the areas to be tested. The goal is to avoid disturbing settled dust and having it become airborne shortly before or during the test.
Step 2
Equipment needed
- 1 tape measure
- 1 vacuum cleaner with hose attachment
- 1 extension cord
- 1 roll of duct, paint, or masking tape
- Stopwatch or kitchen timer with 5 minute increments
- 1 vacuum dust kit (purchased from EMSL Analytical, Inc.)
Prepare the test areas
For residential sampling, EPA researchers recommend taking a living room and bedroom sample as a composite using the same vacuum dust collector for both rooms. Other areas should be sampled separately.
- In the Common Living Area (family room or living room), select the sofa. In the absence of a sofa, select another commonly used chair. Using the tape measure and the roll of tape, mark the corners of a 3 foot x 6 foot rectangular sampling area against the long side of the sofa. If the area cannot accommodate the recommended sampling area, adjust the dimensions accordingly (but try to sample a total of 18 square feet). Record the final sampling area you marked with tape on the lines corresponding to the room you sampled on the data sheet.
- For the Bedroom, select the most frequently used bedroom. If there is more than one bed in the bedroom, select the frequently used bed. Using the tape measure and the roll of tape, mark the corners of a 3 foot x 6 foot rectangular sampling area on the floor immediately against the side of the bed where the resident is most likely to get in and out of the bed. If possible, try to have the rectangular sampling area extend under the bed by three or four inches so that part of the sample goes under the bed. If the area cannot accommodate the recommended sampling area, adjust the dimensions accordingly (but try to sample a total of 18 square feet). Record the final sampling area you marked with tape on the lines next to the bedroom you sampled on the data sheet.
- Areas other than the Living Room, Family Rooms, or Bedrooms may be sampled. If you choose to sample other areas, a separate vacuum dust collector should be used for each area. Please call the lab if you have any questions.
- To familiarize yourself with the procedures, read over Step 3 below before you start the test.
Step 3
Taking the test
- Make sure the hose attachment is connected to your vacuum cleaner properly. Turn on the vacuum cleaner to make sure the hose attachment is pulling air, then turn off the vacuum cleaner.
- Sometimes the dust collection device will not fit correctly onto the hose attachment. If this is the case, you may use duct tape or electrical tape to hold the dust collector to the hose attachment.
- Use the extension cord as needed to reach the marked area with the vacuum hose.
- Remove both caps from the sampling device. Place the caps in a location so you can find them after the test is completed.
- Attach the flat, round end of the sampler device to the end of the hose attachment of your vacuum cleaner.
- Use the slanted end of the sampling device to collect your sample. Keep the slant end of the sampling device flush with the surface to be sampled.
- Turn on the vacuum cleaner and start the watch or timer. Start timing the vacuuming procedure using the stopwatch. Try not to disturb the tape. Try not to exceed the 5 minute sampling period.
- Vacuum within the taped off area. Do this by passing the sampling device over slightly overlapping, imaginary parallel lines within the sampling area for about 5 minutes. If necessary, adjust your rate of movement so that a total of 5 minutes is used to vacuum the entire 18 square foot sampling area.
- Move to the second room and repeat the vacuuming of the target area. After the sampling is completed, hold the sampling device upward toward the ceiling and turn off the vacuum cleaner. Re-cap the slant end of the sampling device so as not to lose any of the dust collected.
- Avoid vacuuming up any large debris that is not dust. If you accidentally suck up the tape, point the sampling device toward the ceiling and turn off the vacuum cleaner. Pick the tape out of the sampling device. Turn the vacuum cleaner back on the return to vacuuming the sampling area. Be sure to account for any lost sample time when you do this, so you get a total of 5 minutes of sample time.
- Separate the sampling device from the hose of the vacuum cleaner and re-cap the flat end of the device.
- After the small caps are secured on the dust sampling device, make sure there is dust in the sampling container before you send it to the lab. If no visible dust is noticed, repeat the sampling procedure in both rooms in different locations until visible dust is present in the device.
- If you lose the small caps, seal the openings completely and securely with duct or electrical tape.
Step 4
Complete the paperwork
- On the data sheet, fill in the number of the sampling device where necessary (found underneath the bar code on the side of the box)
- On the data sheet, identify all the areas sampled using that particular sampling device number.
- Fill out all the information completely accounting for any adjustment of the 18 square foot sampling area.
- Place the sampling device with its correct data sheet back in the box.
- Seal the box with tape to prevent opening during shipment.
Step 5
Return the sampling device
- Mail the box back to EMSL. It is essential that only labs that are licensed by the EPA to use this patented technology perform this analysis. EMSL currently holds this license with the EPA.
- Results will be ready after 5 business days.
- Rush results are available subject to a surcharge.
A written report comparing your home to the ERMI will be sent to the mailing address identified on the data sheet.
Step 6
What Next?
If your results indicate that your home has potential mold problem, we recommended that you hire a qualified firm to identify the source of the mold problem. You may refer to your yellow pages under environmental consultants. Also check the following websites for a listing of qualified indoor air quality professionals in your area:
Please keep this section for your records.
The EMSL mold test kit is intended for use only as described in the enclosed instructions. These instructions area applicable for residential use. For non-residential applications, please call EMSL for the appropriate sampling protocols. EMSL is not responsible for user error in sampling. EMSL is not liable for any damage to appliances used in collection of these samples. This kit is not intended to be used in lieu of a visual and complete inspection of the premises sampled. In no event shall EMSL be held liable for direct, special, consequential, or incidental damages, regardless of the negligence (either sole or concurrent) of EMSL and whether EMSL has been informed of the possibility of such damages, arising out of or in connection with EMSL’s services hereunder or the delivery, use, reliance upon or interpretation of test results by the client or any third party. EMSL accepts no legal responsibility for the purposes for which client uses the test results. In no event shall EMSL be liable to a client or any third party, whether based upon theories of tort, contract or any other legal or equitable theory, in excess of the purchase price.
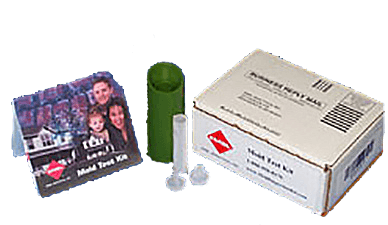
PCR SAMPLING
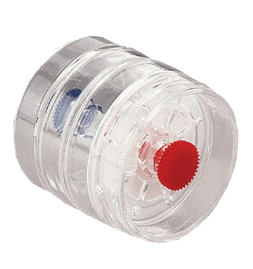
PCR Air Sampling
(Air Cassettes are available from EMSL, Product IDs 8715309 and 8715251)
- Obtain PCR air sampling cassette from EMSL.
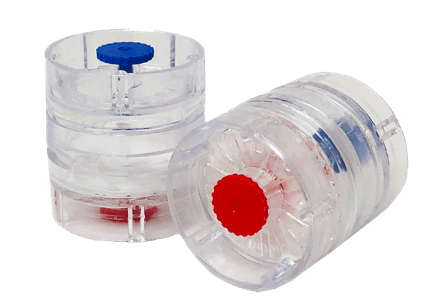
- Remove the upper (blue) and lower (red) plugs of the cassette.
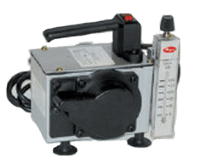
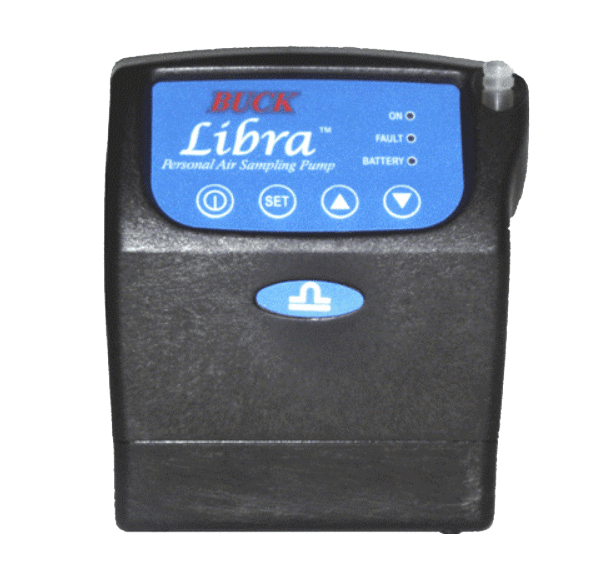
- Attach a vacuum pump to the cassette through the lower opening.
- Set pump flow rate for 10 liters per minute – 13 liters per minute.
- as much air as desired through the upper opening. There is no upper limit to sampling time, however collecting 1000 liters of air is adequate for most of PCR tests.
- Place each air cassette into the individual air-tight container such as a Ziploc plastic bag.
- Clearly label the plastic bag with sample identification.
- Fill the EMSL Chain of Custody specifying sample number, collected air volume, collection location, time, and date.
- Ship cassette to EMSL.
PCR Bulk Sampling
(2 oz and 4 oz Glass Jars are available from EMSL, Product IDs 8714223 and 8714232)
- Obtain plastic bags or glass jars from EMSL.
- Locate the representative portion of bulk material.
- Collect small amount of material with spoon, spatula, or any other tool.
- Place the sample in a clean, air-tight container such as Ziploc plastic bag or small glass jar. Seal tightly.
- Clean up any residual material on the outside of the container. If necessary, disinfect with alcohol wipes.
- Clearly label the container with sample identification.
- Fill the EMSL Chain of Custody specifying sample number, collection location, time, and date.
- Ship bulk sample to EMSL.
PCR Swab Sampling
(1 ML Butterfields Swab is available from EMSL, Product ID 8708935)
- Obtain a swab from EMSL to collect specimen.
- Wearing gloves, remove the swab from transport tube.
- Swab the desired area thoroughly, rolling the swab lightly back and forth over sampling area. Sampling area of 4” x 4” is adequate for most of PCR tests.
- Insert swab into the tube with transport medium and firmly close the cap.
- Clearly label the transport tube with sample identification.
- Fill the EMSL Chain of Custody specifying sample number, sampling area, collection location, time, and date.
- Ship swab to EMSL.
PCR Dust Sampling
(Dust and Allergen Sampler is available from EMSL, Product ID 8715600)
- Obtain Dust and Allergen Sampler from EMSL.
- Remove white plastic caps from both ends of the Dust and Allergen Sampler.
- Attach Dust and Allergen Sampler to the vacuum cleaner hose or tube.
- Turn on the vacuum cleaner and vacuum area necessary to obtain enough material for PCR testing. There is no upper limit to sampling time, however collecting at least 5 mg of dust is required for most of PCR tests.
- Disconnect Dust and Allergen Sampler from the vacuum cleaner hose or tube.
- Attach white plastic caps to both ends of the Dust and Allergen Sampler to secure dust sample inside the inner mesh plastic tube.
- Insert each Dust and Allergen Sampler into the individual air-tight container such as a Ziploc plastic bag.
- Clearly label the plastic bag with sample identification.
- Fill the EMSL Chain of Custody specifying sample number, collection location, time, and date.
- Ship Dust and Allergen Sampler to EMSL.
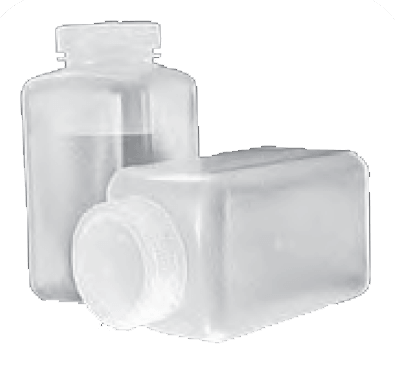
Water Testing Bottles
FREE to EMSL
Customers Call for
Details
PCR Water Sampling
(120 ml, 250 ml, and 1000 mL Sterile Plastic Bottles with Preservative are available from EMSL, Product IDs 87M007, 87M005, and 87M001).
- Obtain Sterile Plastic Bottles with Preservative from EMSL.
- Fill container with specified volume of water and seal securely to prevent leakage during transport. Collecting between 100 milliliters and 1 liter of water is adequate for most of PCR tests.
- Clean up any residual liquid on the outside of the container. Disinfect with alcohol wipes if necessary.
- Clearly label Plastic Bottle with sample identification.
- Fill the EMSL Chain of Custody specifying sample number, water volume, collection location, time, and date.
- Pack Bottles to the insulated container with ice packs to avoid sample overheating during shipping.
- Ship water samples to EMSL with overnight delivery.
PCR Bacterial and Fungal Culture Sampling
- Bacterial and fungal strains can be submitted for identification as axenic cultures on agar plates.
- Isolated colonies must be visible on a plate to ensure culture purity and accuracy of the identification.
- Clearly label agar plate with sample identification.
- Fill the EMSL Chain of Custody specifying sample number.
- Pack agar plate to the insulated container ensuring sample integrity during shipping.
- Ship agar plate to EMSL.
ALLERGEN SAMPLING
Procedure for dust sampling with the dust collector
- Identify four (4) separate areas to sample. Each area sampled should be about 1/4 of a square meter (approx. 2.75 square feet)
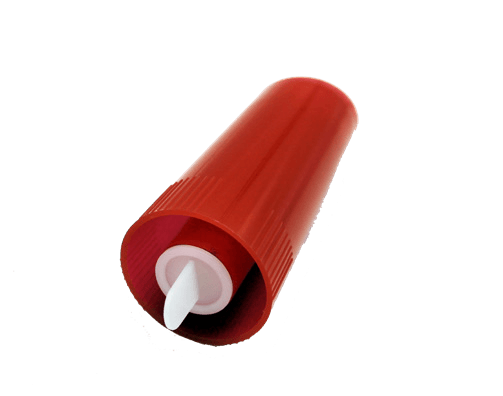
- Remove the white caps from both ends of the red collector cassette. Keep them to reattach once sampling is complete.
- Attach the non-slanted end of the red cassette to the vacuum hose/tube. (A vacuum with a HEPA filter is recommended)
- Use the slanted end to collect dust for 30 seconds in each of the four (4) areas. Total sampling time and area collected, per red cassette, should be 2 minutes and 1 square meter, respectively.
- The minimum amount of dust collected inside of the red collector should be half way up the mesh filter.
- Once sampling is complete, replace the white caps on either end of the red cassette and place it in a small Ziploc bag or equivalent. Write on the bag with your sample number/ name, and location. (ie. Sample 1, Bedroom)
- Send the filters containing the dust sample to EMSL Analytical, Inc. for allergen analysis utilizing an EMSL Microbiology Chain of Custody form. Select your desired turn-aroundtime.
| Indoor Allergen Analyses Available | |
|---|---|
| Test Code | Description* |
| M034 Cat Dander | Cat Dander (Fel d 1) |
| M035 Dog Dander | Dog Dander (Can f 1) |
| M036 Cockroach | Cockroach (Bla g 2) |
| M037 Dust Mites | Dust Mites (Der p 1 & Der f 1) |
| M038 Mouse | Mouse (Mus m 1) |
| M039 Rat | Rat (Rat n 1) |
| M044 IA Group | Cat, Dog, Cockroach, and Dust Mites |
| M254 IA Group | Rat and Mouse |
| * All analyses are performed by MARIA (Multiplex Array for Indoor Allergens). | |
| * Multiple allergens can be analyzed from a single filter with a dust sample. | |
Carpet Sampler Kit available
for Consultant Use Only.
EMSL Carpet Sampling
Kit 25mm Kit
#8715314
Procedure for air sampling for laboratory animals
- Utilizing a low-volume sampling pump, sample the work environment with a 37-mm cassette with either a 1.0 micron glass fiber filter or a 0.8 micron MCE filter.
- Collection time should be 1.5-2.5 liters per minute and the sampling time should be four (4) to eight (8) hours. (Note time in minutes for chain of custody)
- Label each sample cassette with location name and date/time sampled.
- Utilize an EMSL Microbiology Chain of Custody Form, and complete with your requested Billing and Reporting Information. For each sample collected, include the sample number, location, matrix (Air), Test Code (see below), Total Volume collected in minutes (ie. 1.8LPM x 240 minutes = 432 total sample volume), and Date/Time collected. Sign, and submit to EMSL Analytical, Inc. – Cinnaminson, NJ location.
| Allergen Analyses Available | |
|---|---|
| Test Code | Description* |
| M038 Mouse | Mouse (Mus m 1) |
| M039 Rat | Rat (Rat n 1) |
| M254 IA Group | Rat and Mouse |
TOTAL COLIFORM SAMPLING
Chain of Custody
Must contain sampling date, time sampled, and sample source. This is needed to determine whether samples are within hold times and valid for analysis. If looking for Total coliforms, please inform us if you would like Presence/Absence (Colilert) or Enumeration (MPNMost Probable Number or MFT-Membrane filtration technique).
Sample Collection
All water samples must be taken in approved, sterile sampling containers, which our laboratory can provide upon request. Treated (municipality/distribution systems) water samples must be de-chlorinated with sodium thio-sulfate (this is already in bottles that are provided by our laboratory). Keep sampling bottle closed until it is to be filled at the sampling location.
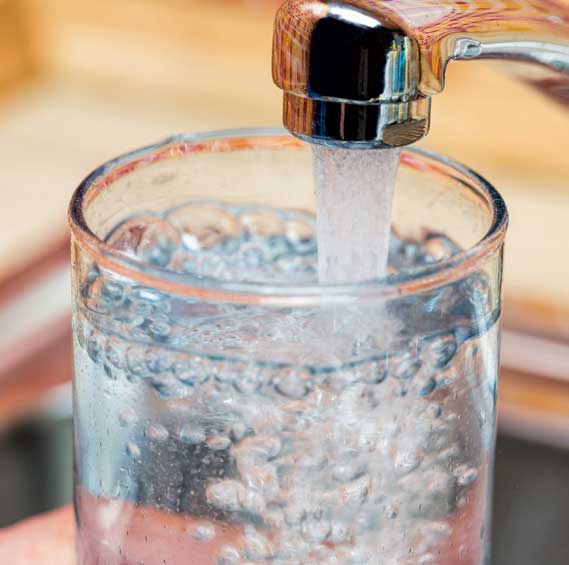
Distribution or sink tap sample
- Remove aerator from faucet.
- Rinse faucet with a bleach solution.
- Flush line- by turning tap fully on and letting it run for two to three minutes, or for a time sufficient to permit clearing the service line.
- Reduce water flow to permit filling bottle without splashing.
- 100mL is needed for each sample submitted for analysis.
Well samples
If a sample is taken from a well fitted with a hand pump, pump water to waste for about five minutes before collecting sample. If the well is equipped with a mechanical pump, collect sample from a tap on the discharge. If there is no pumping machinery, collect sample directly from the well by means of a sterilized bottle fitted with a weight at the base; take care to avoid contaminating sample by any surface scum.
Hold Times
Hold times for regulatory samples are 30 hours for the Presence/Absence test method and 8 hours for membrane filtration method. Non-regulatory samples are hours regardless of test method.
If client is aware that hold times are going to be exceeded but would like analysis to proceed anyway, please indicate this on the Chain of Custody.
If hold times are exceeded results are invalid and this will be noted on the final report.
Turn Around Times
Total coliform-Presence/Absence (Colilert) or enumeration (MPN) results can be reported in 24 hours.
Total coliform enumeration (MFT) results will take 6-10 days.
Sample Shipping
All samples must be shipped cold, not frozen and should remain up right. The best way to ship method of shipment for these samples is to use ice packs, not soda bottles filled with frozen water, bags of ice or just loose ice. Samples that are not shipped properly could end up getting contaminated or rejected.
SEWAGE CONTAMINATION IN BUILDINGS
- Methods available to test for sewage contamination in buildings include:
- M117 – a culture-based method detecting Total Coliforms, E. coli, and Enterocci (48 hr. TAT)
- M013 – a culture-based method detecting Total Coliforms, Fecal Coliforms, E. coli, and Fecal Streptococcus (6-10 day TAT)
- M095 – a new PCR-based method detecting Total Bacteroides (24 hr. TAT available)
- The culture-based methods have the advantage of looking for only living bacterial contaminants which may be the only ones of interest if disease is of concern. Endotoxin testing can also be of value to measure the total amount of Gram negative bacteria in the building (see page 17).
- The Bacteroides test has some advantages over the traditional culture-based tests including:
- Bacteroides is specific for fecal contamination from all sources – animals, birds, and human
- Coliforms, E. coli, Fecal Streptococci, and Enterococci can grow in water, soil, sediments and on vegetation in uncontaminated environments (E. coli is found in pristine tropical environments).
- Bacteroides will not multiply in the environment.
- Bacteroides outnumber coliforms by 1.000:1 and outnumber E. coli by 10,000:1; therefore, the chance of finding Bacteroides is greatly enhanced.
- Traditional culture-based tests rely on the presence of live bacteria. These bacteria often will not be viable in indoor environments. THIS MEANS THAT A NEGATIVE COLIFORM or E. COLI RESULT DOES NOT MEAN THE ABSENCE OF FECAL CONTAMINATION. The new Bacteroides test overcomes these culture limitations. The laboratory can detect live, nonviable, or viable but not culturable bacteria.
Sampling Procedure for all Sewage Contamination Tests
- Obtain a sterile 1 mL Butterfield’s Solution swab (EMSL Product ID 8708935) to collect and transport samples (provided at your request by EMSL).
- With gloves on, remove swab from sterile packaging.
- Carefully unscrew cap of sampling device – swab is attached to the lid of the cap.
- Gently press out excess solution from sampling swab by pressing the swab against the inside wall of the tube with a rolling motion.
- Hold swab at an approximate 30° angle from the sampling surface, taking care not to contaminate any part of the swab or the sampling site.
- Using firm, even pressure move the swab slowly and thoroughly over an entire 4” x 4” sampling area, rewetting the swab tip with the Neutralizing Solution as needed. First horizontally, then vertically:
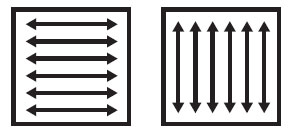
- After sampling is complete, carefully put swab back into vial and close cap tight.
- Label the sample using a permanent ink marker.
- Background samples in non-fecally contaminated areas should be taken.
Sample Shipping
- Samples that will be submitted for culture-based analysis must be shipped overnight cold, not frozen, within 24 hours from the sample collection. The best method of shipment for these samples is to use a cooler with freezer packs, not bags of ice or loose ice.
- There are no special shipping requirements or hold times for Bacteroides since they will not multiply outside of the intestine. However, do not store sample longer than a month before analysis.
LEGIONELLA SAMPLIN
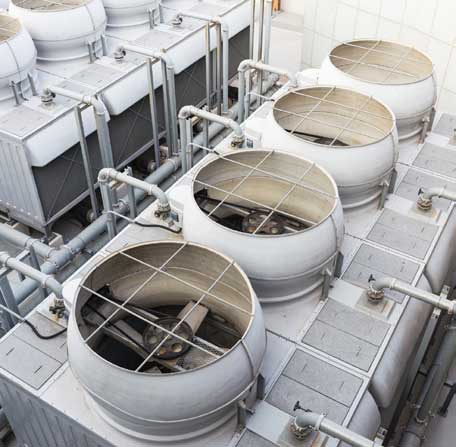
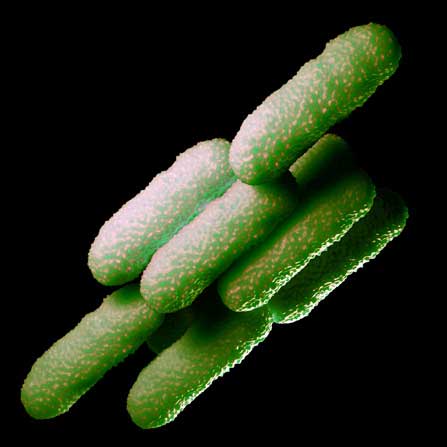
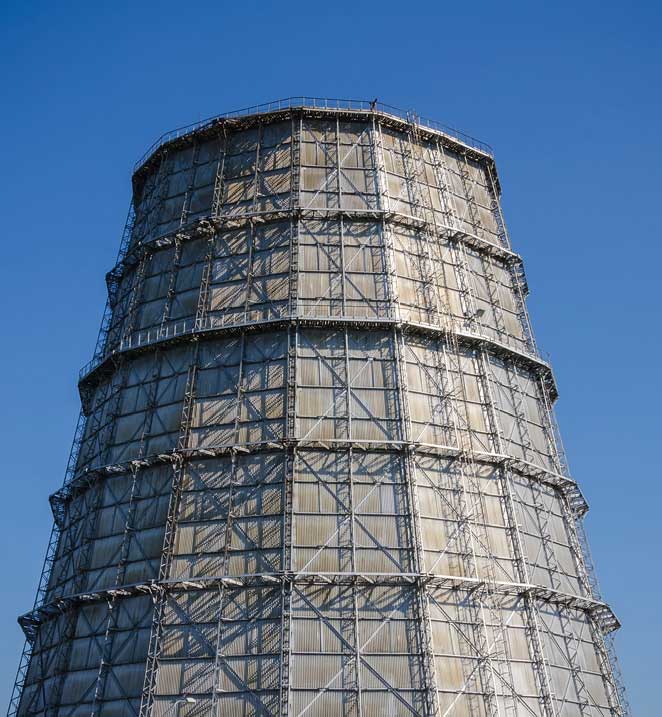
Legionellaceae are ubiquitous in surface water, groundwater, estuarine environments. Most outbreaks of disease due to Legionella are due to contaminated mist from cooling towers and potable water distribution systems. Exposure occurs from contaminated, aerosolized water.
We offer four different culture-based methods depending upon the level of information you need. For more information about the different tests please go to www.legionellatesting.com. All culture tests require 10-14 days before completion.
We also offer several different PCR methods depending upon the information you need. More information about these can also be found at www.legionellatesting.com. While the culture method is considered the “Gold Standard”, PCR is useful for ruling out possible Legionella contamination in time-sensitive projects. PCR results can be requested same-day, 24 hrs. and 48 hrs. depending on your needs.
Where to Look
This is a list of water systems that have been demonstrated to harbor Legionella bacteria and have been associated with outbreaks. Their investigation should be included in any Legionella Risk Assessment program:
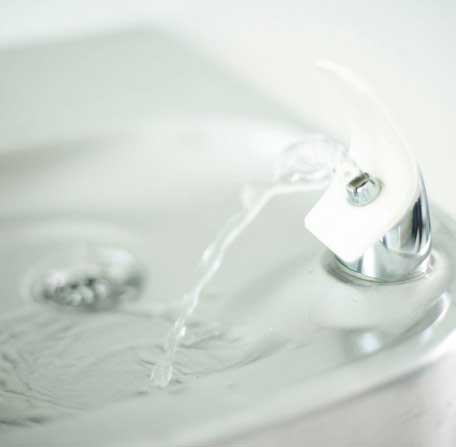
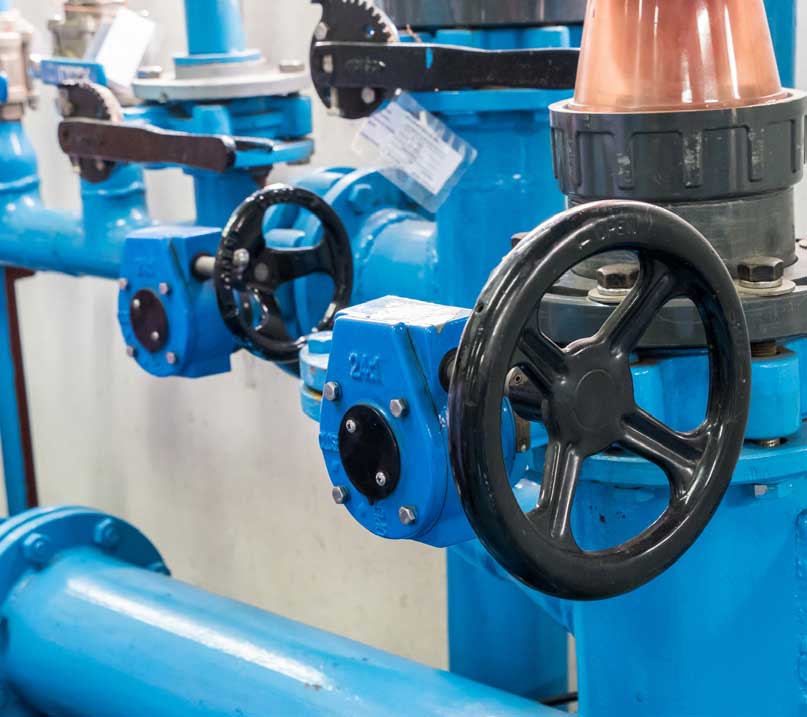
- Potable water systems
- Cooling towers
- Aerosol generation during the biological treatment of some industrial process wastewater streams. For example, pulp and paper manufacturing, food and beverage manufacturing and pharmaceutical manufacturing.
- Aerosol generation during municipal water and wastewater treatment
- Raw, utility or fire water
- Ornamental outdoor and indoor water fountains and ponds
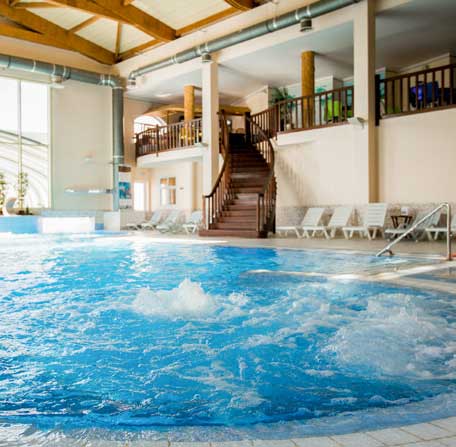
- Heated swimming pools
- CPAP water
- Potting soil
- Hot tubs
- Humidifiers
- Metal working fluids
- Medical therapy equipment like dialysis units, nasogastric tubes, respiratory equipment and nebulizers, whirlpool baths
- Commercial car wash facilities particularly those using recycled water
- Supermarket vegetable misters
- Ice machines in hotels and hospitals
- Outdoor body misters at ballparks and amusement parks*
*Has not been associated with any cases of legionellosis.
Sampling Considerations
- Water samples must be collected in sterile vessels (available from EMSL).
- A 1 L water sample is recommended for potable waters (containing sodium thiosulfate).
- Less than 1 L is acceptable if higher levels of bacteria are suspected.
- Chlorinated water must be treated with sodium thiosulfate.
- 100-250 mL is typically sufficient for non-potable water samples.
- In addition to collecting water samples it is useful to collect a swab of the biofilm found in the water supply pipes.
- Samples must be transported to the laboratory within 24 hrs. in coolers with freezer packs.
Potable Water Sampling Locations - Sample Semi-Annually
- City Water Main Entry Point
- Storage Tanks
- Hot Water Heater Drain Point*
- Hot Water Return
- Last Point on Cold Water/First Point on Hot Water
- Last Point on Hot Water*/First Point on Cold Water
- 10% of Selected Outlets (water and swab)*
*Test routinely
Legionella Routine Sampling Locations
- Test all locations to establish a baseline
- Test all locations during an outbreak
Sample Shipping
- Label sample number on the bottle and record on the chain of custody.
- Use a distinctive number for each sample. Complete all sample information on a sample data sheet for your own record. Send a copy with the samples to the laboratory. You can download a copy of the Chain of Custody form on our website www.emsl.com.
- Tightly cap the bottles. Make sure that water does not leak during shipping and transporting. Taping of the bottle around the cap and neck with electric vinyl tape is recommended. Place taped bottles in a clean plastic bag.
- Place the samples in insulated boxes or on freezer packs to protect them from extreme temperature fluctuations in the summer months. NEVER USE ICE OR DRY ICE. Stuff the box with foam chips to cushion and seal the box securely for shipping. Send samples by overnight express carrier. Schedule sampling between Monday and Friday so that samples can be delivered to the laboratory no later than Saturday
Cooling Tower Sampling Locations - Sample Quarterly
- Tower Makeup
- Tower Sump away from makeup* (water and swab)
- Inlet to Heat Exchanger
- Outlet from Heat Exchanger
- Distribution Pack
- Tower Pack* (water and swab)
MRSA SAMPLING
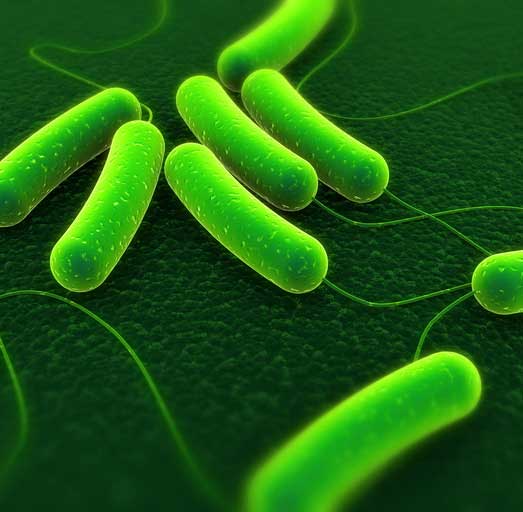
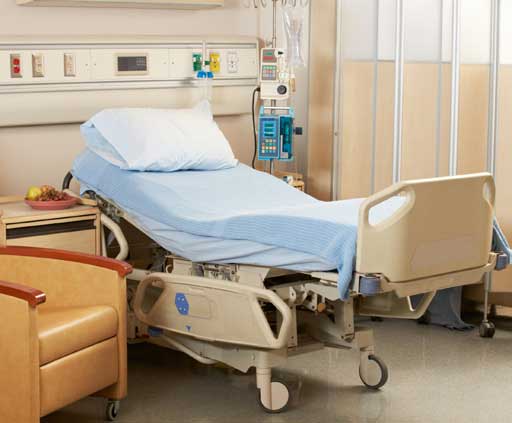
Methicillin-resistant Staphylococcus aureus, (MRSA) is a type of bacteria that is resistant to treatment with antibiotics related to penicillin. This bacterium is generally spread through direct contact with the hands of a health care worker or person who is infected or carrying the organism. There are also community-acquired infections that have occurred outside the hospital environment in places such as gyms, schools, daycares, cruise ships, and elderly care facilities.
EMSL Analytical, Inc. provides MRSA Analysis of Environmental Samples (swab, bulk, or water). Please note, we are not able to accept clinical specimens for testing.
Caution must be taken by wearing gloves when collecting samples from contaminated items; put on clean gloves immediately before collection. Remove gloves promptly after use, before touching non-contaminated items and environmental surfaces and wash hands immediately to avoid transfer of microorganisms to other environments.
Sampling Procedure
Swab Sampling
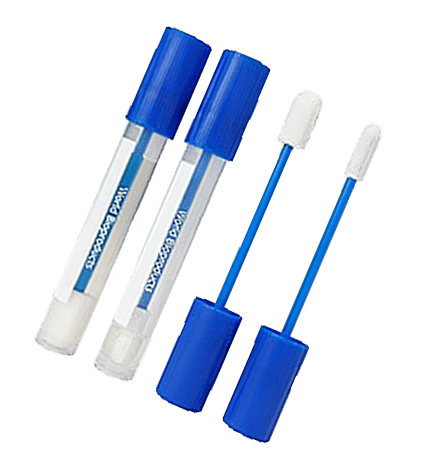
- Obtain a sterile 1 mL HiCap Neutralizing broth Pur-Blue swab (Product ID 8708942) from EMSL to collect samples for culture.
- Remove swab from packaging material and swab the desired area thoroughly, rolling the swab lightly back and forth over sampling area. A 4”x 4” area is recommended. Insert the swab into the tube and firmly close the cap. Ship the swabs to EMSL.
Bulk Samples
- Wearing gloves, remove a small piece of the suspect material. Place piece inside a clean sterile container or new plastic bag (Ziplock).
- Close the bag or cap the container and label appropriately.
Sample Shipping
- All samples must be shipped overnight cold, not frozen, within 24 hours from the sample collection. The best method of shipment for these samples is to use freezer packs, not bags of ice or loose ice. Samples that are not shipped properly could get contaminated and may be rejected by the lab.
- EMSL offers two culture-based MRSA testing methods (Code M729 for P/A) and (Code M730 for Quantitative).

ENVIRONMENTAL ENDOTOXIN SAMPLING
Endotoxins are molecules that have certain characteristic toxic effects. They are now recognized as a class of compounds found in the outer membrane of certain (“Gram-negative”) bacteria. Since these Gram-negative bacteria are widespread in the environment, so are endotoxins. High levels have been reported from a variety of environments, such as cotton mills, agriculture or wastewater treatment facilities, industrial wash, water mists, and contaminated room humidifiers, where water and Gram-negative bacteria can be expected to be present. The most important kinds of reservoirs are recirculated water-based fluids that produce aerosols.
Summary of Procedures
Air samples are collected on endotoxin-free membrane filters, stored desiccated wherever possible, or stored at 4°C. Endotoxin analysis can be done on air, water, dust, or bulk specimens.
CAUTION: There are no accepted threshold values, so relative value comparisons have to be made between the suspect area, and a non-suspect one under similar environmental conditions. Since endotoxin levels may be significant in outside air, the latter may not be suitable for background levels, especially in environments known to have high levels of Gram negative bacteria (see above, 1st paragraph). All sampling utensils must be certified endotoxin-free, and PVC and polypropylene materials cannot be used due to their affinity and binding with endotoxin.
Materials
Fluids and Bulk samples:
- Collect in endotoxin-free (preferably glass, alternatively polystyrene) containers.
Equipment Needed For Air Sampling:
- Low-flow pump
- Rotameter
- Flexible tubing
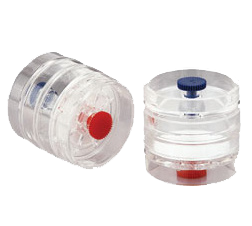
- Endotoxin-free polystyrene cassettes with 37mm diameter 0.2 µm polycarbonate membrane filters and AP40 glass-fiber backing pads. These must be specially treated to remove all endotoxins, please order from EMSL.
- Sterile surgical gloves should be worn when sampling.
Sampling Procedure
For air sampling:
- Caution must be taken to avoid breathing on, touching, or otherwise exposing the sampling containers to human contamination.
- For indoor sampling, ensure that all doors and windows are closed.
- Calibrate pump to 1.5 liters/minute
- Using gloves, connect cassette to pump with the red-capped end toward the pump. Collect air samples for 4 hours per sample.
- Disconnect cassette and replace the protective covering back on both the inlet and outlet of the cassette. Wrap entire cassette in original packing and seal with tape.
For fluids and bulk specimens:
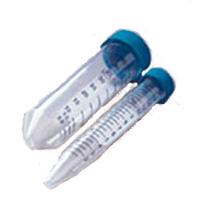
- Collect specimen in an endotoxin-free container. 15-50 mL is typically sufficient.
For all matrices:
- Label with sample information.
- Complete an EMSL Chain of Custody (COC), available on the website (www.emsl.com), detailing client name and information, project name or number, sample #, and a description of the area.
- Ship samples to EMSL Analytical, Inc. as soon as possible. Fluid samples must be shipped with ice packs.
Quality Control Suggestions
- Multiple specimens need to be collected at a site in order to compare a possibly affected area with an unaffected one.
- The containers used for test materials must be neither cracked nor broken, and with the packing material still intact.
LIMITING CONDITIONS FOR PATHOGEN GROWTH
Guidance provided by EMSL Analytical, Inc.
| Pathogens | Min. aw | Min. pH | Max pH | Max % salt | Min. Temp. (°C) | Max Temp. | Oxygen Requirement |
|---|---|---|---|---|---|---|---|
| Campylobacter jejuni | 0.99 | 4.9-5.5 | 8.0 | 1.5-2.0 | 30-32 | 42-45 | Micro-aerophilic |
| Clostridium botulinum type A, and proteolytic B and F | 0.93-0.96 | 4.7 | 9.0 | 10.0 | 10.0 | 48-50 | Anaerobe |
| Clostridium botulinum type E, and nonproteolytic B and F | 0.93-0.96 | 4.7-4.8 | 9.0 | 4.5-6.0 | 3.0 | 45 | Anaerobe |
| E. coli | 0.93-0.95 | 3.6-4.7 | 9.5 | 7.5-8.0 | 0.6-3.0 | 45 | Facultative anaerobe |
| Listeria monocytogenes | 0.92-0.95 | 4.8 | 9.6 | 8-12 | 0-2.0 | 45 | Facultative anaerobe |
| Salmonella spp. | 0.92 | 4.0 | 9.0 | 8.0 | 5.0 | 46-47 | Facultative anaerobe |
| Shigella spp. | 0.96 | 6.0 | 10.0 | 6.0 | 7.0 | 46 | Facultative anaerobe |
| Staphylococcus aureus | 0.85-0.86 | 4.0 | 10.0 | 18-20 | 5-6* | 45-45 | Facultative anaerobe |
| Vibrio cholerae | 0.95 | 3.6-6.0 | 9.6 | 6-8 | 8.0 | 42-46 | Facultative anaerobe |
| Vibrio parahaemolyticus | 0.94 | 4.8-5.0 | 9.6 | 8-10 | 5.0 | 43 | Facultative anaerobe |
| Vibrio vulnificus | 0.95 | 6.3 | 9.0 | 6.0 | 13.0 | 44 | Facultative anaerobe |
| Yersinia enterocolitica | 0.95-0.96 | 4.1-4.4 | 9.0 | 6-7 | -1.0-1 | 44 | Facultative anaerobe |
*Minimum temperature for toxin formation is 10° C
Micro-aerophilic: requires limited levels of oxygen
Anaerobe: requires the absence of oxygen
Facultative anaerobe: grows either with or without oxygen
MICROBIOLOGY CULTURE MEDIA INFORMATION
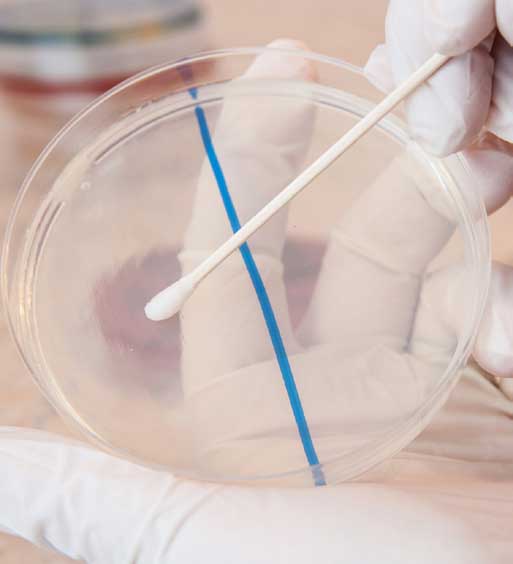
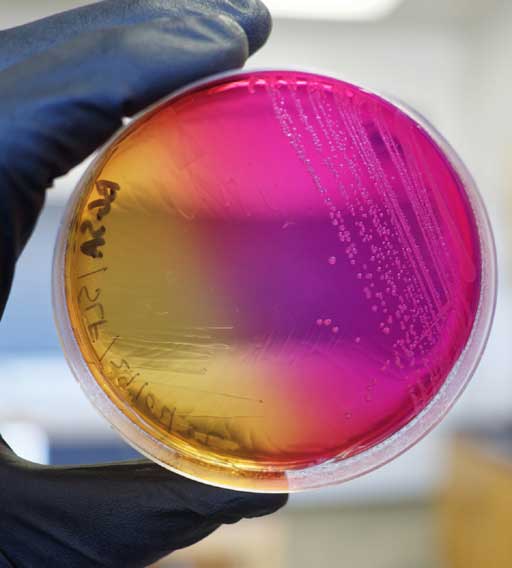
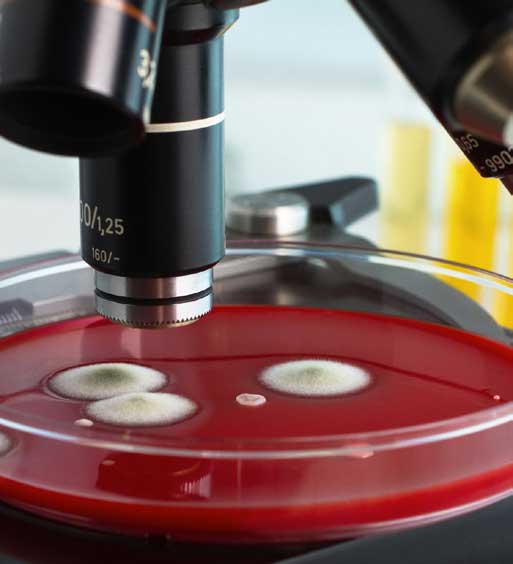
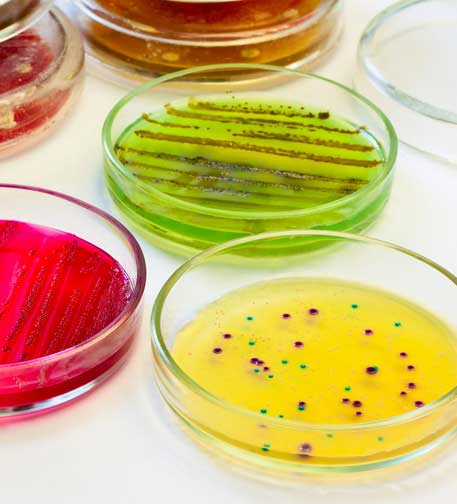
EMSL Analytical, Inc. is able to provide a large variety of sampling media to our customers. The following information is designed to help aid in the selection of culture media, providing the most representative sample of the environment possible. The media listed below are not exhaustive; if you have specific media requirements, please let us know.
Bacterial Media
- TSA (Tryptic Soy Agar)
- TSA w/ 5% Blood
- MAC (MacConkey)
- HE Agar (Hekton Enteric )
- BCYE agar (Buffered Charcoal Yeast Agar)
- MSA (Mannitol Salt Agar)
- EMB (Eosin Methylene Blue)
- BE (Bile Esculin Agar)
- Chocolate Agar
- BHI (Brain Heart Infusion)
- Xylose lysine deoxycholate agar (XLD agar)
Fungal Media
- MEA (Malt Extract Agar)
- PDA (Potato Dextrose Agar)
- Cellulose Agar
- SAB (Sabouraud Dextrose Agar)
- Corn Meal Agar
- DG18 (Dichloran-Glycerol Agar 18)
- Bird Seed Agar
- Mycobiotic Agar
General Media Recommendations for Air Sampling of Culturable Bacteria and Fungi
- For fungal sampling, in most cases, we recommend MEA.
- For fungal species identification use MEA and DG18 plates
- For bacterial sampling, in most cases, we recommend TSA or TSA w 5% Blood.
- When sampling specifically for Gram negative bacteria, we recommend MacConkey Agar.
- The Microbiology Department will be happy to make recommendations based on your individual sampling situation.
Fungal Culture Media
| MEA (Malt Extract Agar) | Gold Standard media for the speciation of fungi. |
| PDA (Potato Dextrose Agar) | General-purpose media used for the isolation of fungi and molds. |
| Cellulose Agar | Multi-purpose microbial media used to isolate or for isolating hydrophilic fungi microbes able to utilize complex carbohydrates. Most often recommended in IAQ investigations of Stachybotrys sp. contamination. |
| Corn Meal Agar | General purpose media for the cultivation of fungi from the environment, commonly used in IAQ investigation of Stachybotrys chartarum contamination. |
| DG18 (Dichloran-Glycerol Agar 18) | Media containing 18% glycerol, used for the recovery of Xerophilic yeast and molds. Recommended for recovery in dry locations such as dry powder storage and manufacturing areas. |
| Bird Seed Agar | For the isolation of Cryptococcus neoformans. |
| Mycobiotic Agar | For the isolation of Histoplasma capsulatum |
Bacterial Culture Media
| TSA (Tryptic Soy Agar) | General purpose media for isolation and culture of bacteria (gram positive and gram negative). |
| TSA w/ 5% Blood | General purpose media for cultivation, isolation, and determination of hemolytic activity of bacteria. |
| MAC (MacConkey) | For quantitative procedures for the isolation of gram negative bacteria and for the differentiation of those microorganisms based on fermentation of lactose. |
| HE Agar (Hekton Enteric) | For the isolation and differentiation of gram negative enteric microorganisms. |
| BCYE agar (Buffered Charcoal Yeast Agar) | For the isolation, selection and differentiation of Legionella sp. form environmental samples. |
| MSA (Manitol Salt Agar) | For the selective isolation and differentiation of Staphylococcus sp. |
| EMB (Eosin Methylene Blue) | For the isolation and differentiation of gram negative bacteria. |
| BE (Bile Esculin Agar) | For the isolation and identification of Group D Streptococcus sp. |
| Xylose lysine deoxycholate agar (XLD agar) | For the isolation and differentiation of Salmonella sp. |


 English
 French
 Spanish
 Portuguese